Installing a wireless doorbell is easy! As long as you prepare correctly and ensure you have the correct tools, it is a simple case of installing it.
Installing my wireless doorbell took me around 20 minutes from unpacking to testing!
Follow this guide if you want to know how to set up and install a wireless doorbell.
What Type Of Wireless Doorbell Do You Need?
If you haven’t already purchased a wireless doorbell, you need to consider your circumstances. Typical requirements are as follows:
Waterproof Rating
If your wireless doorbell push button is placed outside, you need a waterproof wireless doorbell.
Expandable – do you need more receivers?
If you need more receivers or most push buttons, look at some of the best expandable wireless doorbell options.
Video or WiFi
With the increasing number of IoT (Internet of Things), it was only a matter of time before you could access your wireless doorbell from a mobile device! These can be very useful as extra security, and it well worth considering.
Working Range
If you have a large house, you may need to think about a good, long-range wireless doorbell. It would help if you remembered that the advertised working range is a clear sight only. Inevitably, you will have objects in the way that will reduce the signal strength. For example, some wireless doorbells can reach over 1300 feet!
Portable
Most wireless doorbell chimes plug into a power socket, but there are options available if you need to carry the receiver around with you.
Volume
If you are hard of hearing, you will need a loud wireless doorbell.
Visual Alerts
Like the volume, when you are deaf or hard of hearing, you need a visual alert to tell you when you have a visitor. Take a look at the best wireless doorbells for those who are deaf or hard of hearing.
Temperature
Live in a cold climate? Then you will need a wireless doorbell capable of working in a low-temperature environment.
Step 1 – The Tools You Need For Installing A Wireless Doorbell

It is essential to get your tools ready before you need them. If you are like me, this will take some time! My tools are scattered around the house, mostly up high, so toddlers cannot reach them!
Let’s take a look at some of the tools you will need:
Screwdriver
Some wireless doorbell options will come with a small flathead that you can use to remove the battery cover on the push button. If your wireless doorbell doesn’t, then it is worth preparing one.
I recommend a good electric screwdriver when installing the wireless doorbell push button. You may be using the adhesive instead of screwing it on, but you will need a screwdriver if you choose to use the screws!
Adhesive
If you will use the adhesive pads to stick the wireless doorbell push button onto the door, it is worth purchasing some more adhesive, just in case it doesn’t go as planned!
Drill
Again, this depends on whether or not you will screw the push button in. If you are, then you will need a drill.
Step 2 – Consider The Location

Objects
As I mentioned above, you will need to consider the location of the wireless doorbell receiver to ensure the signal is not going to be blocked too much. Multiple things will weaken the signal, such as other electrical items, walls, wooden structures. Instead, try to pick a location that is relatively free from obstructions.
Range
Check the manual for the maximum working range and ensure the location is not further away. Most wireless doorbells are perfectly fine, working over 900 feet (line of sight only), I doubt the range will cause you too many problems, but it is worth considering.
Accessibility
Can you access it to change the volume or chime?
You will also need to consider your circumstances. For example, I have a small child going through a phase of turning electrical things off! After a few missed visitors, I relocated the wireless doorbell chime to reach it.
Step 3 – Install The Wireless Doorbell Battery
You must follow the instructions in your manual here.
If your wireless doorbell push button has a battery (some do not!), you will need to add this before installing it.
For this step, you will need a small flat head screwdriver. Then, insert the screwdriver into the designated slot to level the push button apart.
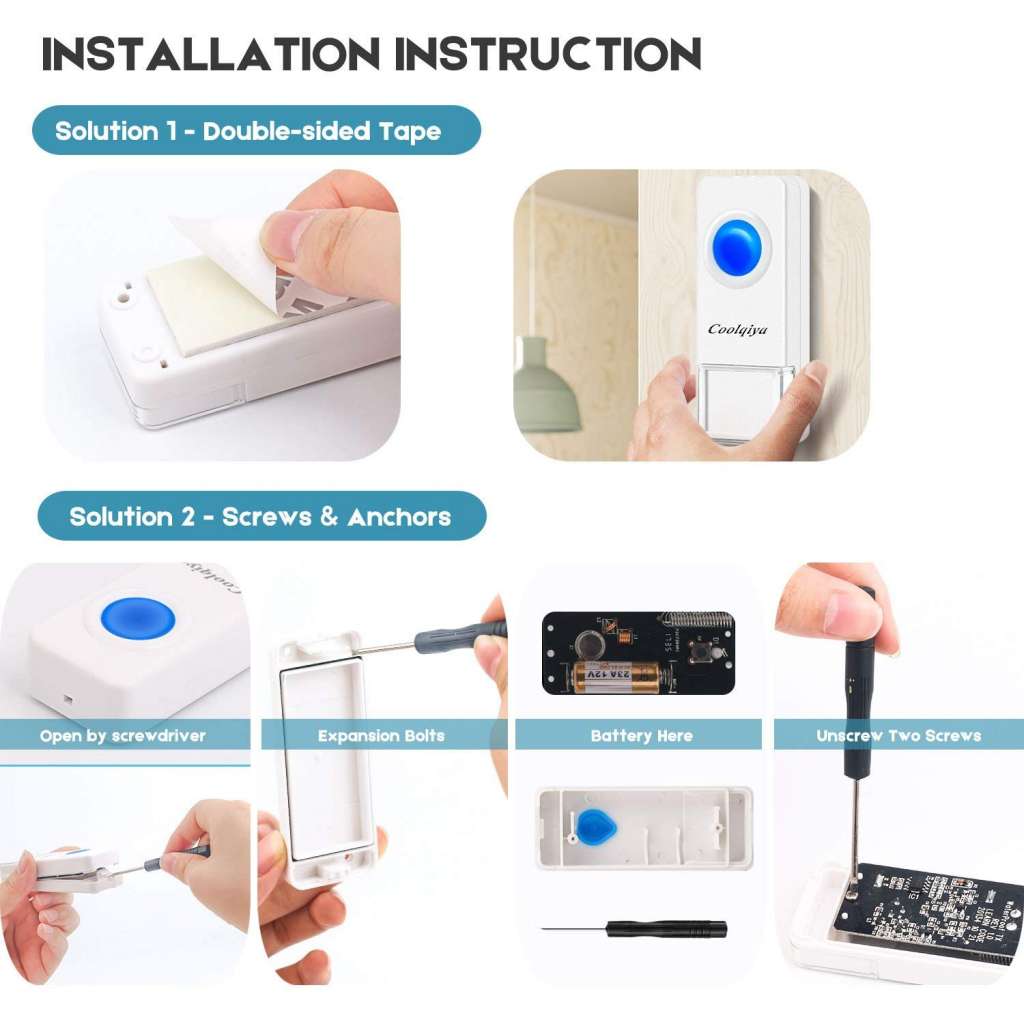
Check out the picture below. It is the instructions for adding the battery to one of my favorite wireless doorbells by Coolqiya.
Step 4 – Sync The Receivers And Set The Ringtone
It is important to sync up your wireless doorbell before installing the push button because you will need both the receiver and the push button within reach.
How to sync a wireless doorbell
That depends entirely on the wireless doorbell solution you have gone for. After looking through many doorbell options, the most common process is:
Select the volume and chime you want to play when the doorbell is pressed on the receiver.
On the push-button – press the doorbell button.
As we wrote above, each wireless doorbell has a slightly different way of synchronizing the push button to the receiver, so you need to check the instructions to ensure that you are doing it correctly.
If you have lost the instructions, please get in touch with us, and we will do our best to help!
You may have a wireless doorbell with two or more buttons, so it is even more critical that you keep the user manual! Usually, you will follow the instructions above for each receiver and each push button.
Step 5 – Push Button Installation
Once you have set the ringtone volume and synchronized the two, you are ready to install the wireless doorbell push button.
If you install the wireless doorbell with the adhesive strips, stick the adhesive to the back of the push button and place it on the doorframe. Ensure you apply equal pressure across the push-button until you are sure the push button is fully stuck on.
I prefer to use the adhesive strips and the screws!
Your wireless doorbell solution should have been supplied with screws and anchors, so you will need to keep them close by.
Before you begin drilling, you will need to access the back panel of the push button unit, which means removing the battery cover again. On the rear panel of the push button, you will either have some markers or some holes. Your first task is to mark the door frame when you need to drill.
If you have holes in the rear panel of the wireless doorbell receiver, this is an easy task. Place the panel where you want the push button to go, and mark holes with a pencil.
I like my wireless doorbell. You have markers (these are marks on the plastic where you will need to drill through), it is slightly more challenging. When installing, you can either pierce the rear panel markers with a small screwdriver or drill straight through them.
Now you have your holes marked. Drill to the depth you need to push in the anchors, add the anchors to the newly drilled holes.
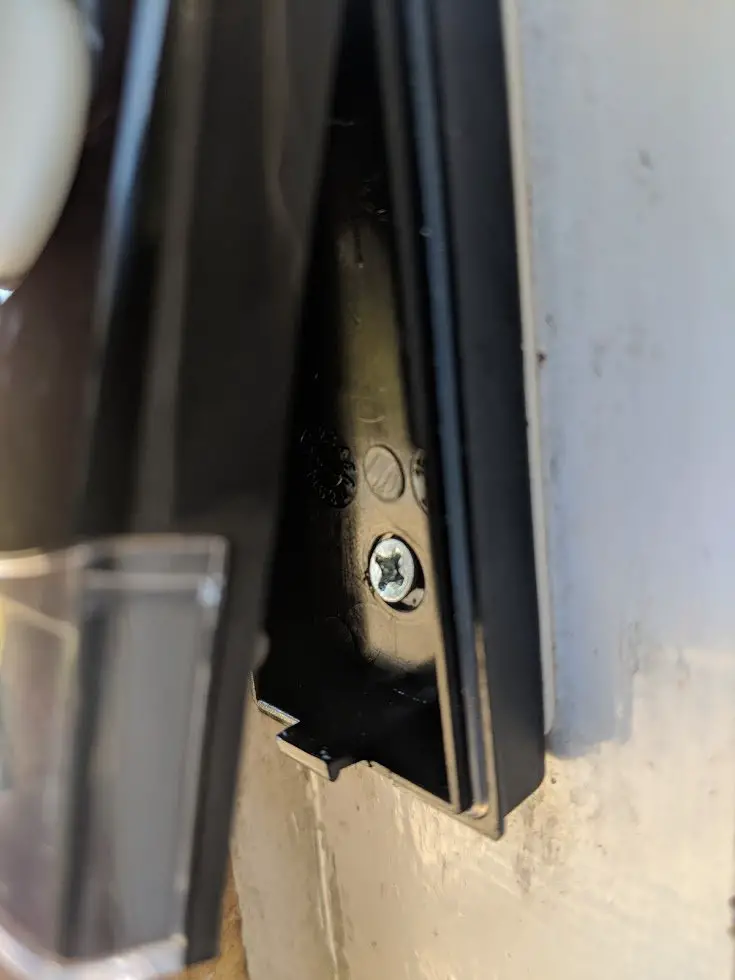
Apply the adhesive to the push button unit before you screw in the wireless doorbell push button. Push both screws through the adhesive and line them up with your holes.
Screw the wireless doorbell push-button in!
Step 6 – Test Your Wireless Doorbell

Now you should have successfully installed your wireless doorbell, easy, eh?
The next step and the final step is to test your wireless doorbell.
It is time to plug in the wireless doorbell receiver if you have not already plugged it in.
As soon as it is plugged in, press the push-button! Hopefully, you will hear the sweets tone that you have previously set.
Now is the time to move the receiver around if you are not happy with the position. However, it is essential to remember that you will need to retest the solution to ensure it is still working within the operating range with every change you make.
Conclusion
This post has you covered if you want to know how to set up a wireless doorbell. I am sure the instructions above have given you a complete run-through of installing a wireless doorbell.
Wireless doorbell installation is pretty straightforward and should not cause you a headache! There are several easy install doorbell options out there. Most wireless doorbells are easy to install, to be honest. It is a simple case of sticking the push button onto your doorframe, plugging in the receiver, and synching them both up.
Installing my wireless doorbell took around 20 minutes from unpacking the box to testing it, and luckily I had no issues with it.
If you need to know how to replace a doorbell, you will first need to remove the old one. Relacing a wireless doorbell is easy; however, it is slightly more challenging if you currently have a wired doorbell.
If you have issues with your wireless doorbell, the first step is to re-check the instruction manual to ensure you follow the instructions.
We have a post that will help you troubleshoot wireless doorbell issues, too, so please check that out!
Good luck with installing your wireless doorbell!
We cannot get the door bells apart with the small screwdrivers. They do not budge. Please help.
Hi Mary
Which Wireless doorbell do you have? Happy to help!
Some of the push buttons can be quite difficult to take apart, especially if they are waterproof.
Kind regards